Wednesday, September 7, 2011

Another Exploding Box

I really like these exploding boxes, they're unique and fun.
I made two more with Christmas in mind, they're both the same-- Candy Cane Stripes with green accents.

Here's the finished product from the outside:
A nice, simple box...


 But open it up...


And the box falls open to reveal these fun layers inside: 


I think these would be great as a special and unique way to wrap a small Christmas gift or Holiday treats.
But, I've also seen these exploding boxes used a mini photo albums. Place a different photo or sentiment on each layer and it would make a creative way to preserve your memories.

And just for fun... here's a progress shot: 
This is what the lids looked like after I attached the green trim around the edges. I though it looked funny, and was worth taking a picture.

Anyway, you can buy one or both of these boxes here, in my etsy shop. Or if you want an exploding box with a different twist leave a comment or convo me on etsy- I would love to create a custom box for you!

Monday, August 29, 2011

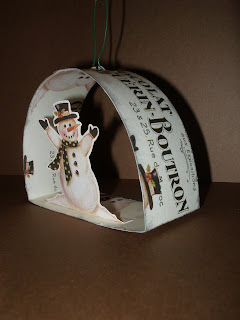
Snowman Ornament

I have a confession... I'm a craft hoarder. Which means:
* I buy craft supplies at clearance/discount price- then store it until I have something to use it for
And it also means:
*I hate throwing scraps away if they seem 'usable'
So I had a few scraps after making my latest exploding box.
I decided to use them to make a Christmas tree ornament.


I'm selling it here in my etsy shop.

Monday, August 22, 2011

Snowman Exploding Box

I've made another exploding box and it's for sale here in my etsy shop


This one is a winter theme and would be perfect for holding a Christmas/holiday gift
I love exploding boxes because they seem so nice and simple on the outside, but they're hiding some extra layers of fun on the inside.


Inside the box

All opened up


Tuesday, August 9, 2011

Children's Quilt

I got the opportunity to make a custom order quilt.


I was asked to make it with large squares of various characters from children's movies and television.
She wanted the quilt to be random, and have no particular direction, so not all of the squares should face the same way.
So here's what I did: 
The back of the quilt is just solid red, in the same fabric as the red on the front.

And After the quilt I had one extra pre-cut square of fabric-
 So I made a bonus pillow, to throw in with the quilt: 

I love making pillows and bedding, You can request a custom order in my etsy shop :JLynneCreations

Monday, August 1, 2011

Car Seat Tent

Just before my last precious baby was born I made a reversible car seat cover.
I love it.
When I'm at the store it keeps people (complete strangers) from touching my baby
It keeps the bright Arizona sunlight out
And It's cute! Especially the brown ruffle around the edge.

Pink and brown on one side:

Solid brown on the other:

Wednesday, June 1, 2011

Double Sided Grocery Totes

With the same fabrics I used for my set of 4 grocery totes, I made two more... these are reversible, so that on the outside of the bag you have one design and another on the inside.

Apples and Watermelon

But you can flip it either way you like.


Apples.....               or...           Watermelon 

 Whatever you like better


Or Jalapenos and Cherries

Or Cherries and Jalapenos

For sale here: 2 Reversible Totes

Monday, May 30, 2011

Reusable Grocery Bags

I have a set of four re-usable grocery bags (or whatever you want to use them for) for sale now in my etsy shop.


I used four fun fresh produce prints for these eco-friendly bags.
Find them for sale here: 4 Yummy Totes!

Steering Wheel Cover

My Husband's car recently became my car. And, scorched by the Arizona sun- the steering wheel had begun to crack and the top was actually beginning to crumble.
So- to prevent further damage and to protect my hands from the super-hot steering wheel (Seriously- if you live in Phoenix, AZ you know- it gets HOT inside cars)

Here's the finished product:

To help grip the steering wheel and to cover the weird texture where little tiny pieces of the steering wheel came off I used cabinet lining in the inside:

 And, how it looks on the wheel:

Saturday, May 21, 2011

An Attempt at Applique

I decided to try my hand at applique for the first time- I thought I knew the general idea, so I didn't bother looking up any tips or tutorials- and somehow I survived.
These are messy, but I was happy with it for a learning experience.
They're coasters- we re-use cups for a day or two in our house, and sometimes (often) I can't remeber which cup was my daughters and which was my sons.
Not a huge problem, I'll admit-- except when one has croupe or the other had brocnhiolotis. We don't want cross contamination on those days.
So to help fix the problem I sewed up some little coasters with our initials on them- so we always remember who had the red cup and who had the yellow cup.


'Daddy'

'Mommy'

'Parker'

'Aria'


Wednesday, May 11, 2011

Kids Apron

Here is one of the six children's sized aprons I made to go with the hot-pads and the oven mitts

Sunday, May 8, 2011

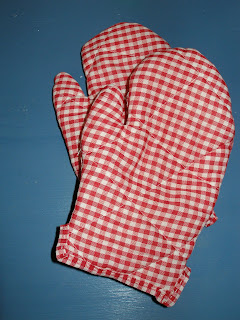
Kids Oven Mitts

The next step in my process of making kids kitchen stuff was the oven mitts (six of them)
I had not pattern, but I drew an oversized oven mitt onto tissue paper and used that as my pattern to cut out 12 pieces of white fabric, 12 pieces of batting and 12 of the red gingham that matched the other portions of the kitchen sets
 I layered a set of white, batting and gingham, and 'quilted' through them by just sewing a few intersecting diagonal lines
 I took two pieces that were opposites of each other (in regards to which way the thumb pointed)

 And I stitched them right-sides together:

 I trimmed the excess, and turned them right side out

Then used some edging I made (exactly the same as the edging I made for the hot-pads) and hand-stitched that around the bottom edge: