Tuesday, June 23, 2009

Midnight Madness 7

While I was making the card for MMSC6- I went ahead and followed the next sketch on Midnight Madness
Here is the sketch for challenge number 7

I rotated this one also, but the best part is that the little butterflies are multi-layered, so the top layer is 3D and popping off the card.

Midnight Madness 6

I made a card for the Midnight Madness Sketch Challenge again this week.
Here is the Sketch for week 6:
And here is what I made:


I rotated it obviously, but I really liked this sketch--the overlapping ribbons is very pretty

Sunday, June 21, 2009

Happy Fathers Day

So today during my sons nap I decided to make two cards for Fathers Day. I used two sketches from two different challenges for the inspiration.
The First was a Card I made for my Husband, it was based on the Sketch from Stamps and Smiles


Here's my card:

The next card I made was "from" my husband to my Father-in-law, I used the Sketch from Sunday Sketch and Stamp for this one:

My Stamps-- I was really limited, I need more stamps that are masculine, or at least neutral, rather than all the flowers and butterflies I have.

And the finished project.

Tuesday, June 16, 2009

Tip Junkie

It's a birthday bash at Tip junkie!


More give-aways everyday!!!!

Tie-Up Card

Here's a pretty, but basic little double fold tie up card
First off, I'll go with all of my cutting...
1- I cut Blue card stock into pieces that were 4"x8"
2- I cut some lightweight white paper into 3x3" squares.
3- I cut some textured white card stock into 3"x1.5" rectangles
4- I used the same blue Card stock and cut 1" squares.
5- I cut 9" lengths of a silky white ribbon, the ribbon is about 3/4" wide.


Instead of folding the card in half, I measured two inches in from each side of the blue card stock and folded each end in.
Then I taped the white square of paper into the center of the card.

I glued one end of a ribbon to the back of each of the textured 1.5"x3" rectangles, and then adhered them to the front of the card.

I then stuck 1" squares onto each side of the opening of the card.
Then, I tied the ribbon into a bow. This card was pretty easy to make and is nice and simple, but still pretty, and just a little bit different than the norm, since it opens in the middle instead of off to the side.


Friday, June 12, 2009

Did You Hear???

It's a Party!!!
One of my blogs that I follow (and love) is having a party to celebrate going to "dot-com"


Speaking of parties you have to check out the Tip Junkie blog if you haven't yet, lading up to her big bash she has posted SO MANY adorable ideas for party ideas and decor

Wednesday, June 10, 2009

flower hair clips

I've spent some time recently making hair clips for my little girl that should soon be making her debut in the world. I don't think people realize how easy and inexpensive it is to make hair clips and how versatile they can be, so I'm going to show how I made them.


I have several different kinds of clips that I have made, but right now I'm only going to show the clips I made using silk flowers.

Just go to your local craft store and find stems of flowers that you like and any ribbon to match; when you get home, you pull all of the flowers off of the stems, and remove any of the plastic "centers".


The clips I use are Conair, perfect shape and size for what I want


And the secret ingredient: cabinet lining. You can buy this in large amounts at any place like Bed Bath & Beyond.


See, you cut it into thin little 1" strips, and when you glue that inside the clip it will help "grip" the hair with out being uncomfortable


Once you've picked your ribbon and flower, you start by using your hot glue gun to glue the ribbon onto the hair clip.


Then take your flower(s) and glue them down one by one

I recommend always using more than one single flower, layering the flowers is just much prettier.

When You've got the flowers on, add something to the center, most often I use small jewels, but buttons, brads, beads, etc... will work
Then also glue the strip of lining inside the clip to finish it off.

Based on the size of your flowers, you may or may not see the ribbon that you use... so if you're using a small flower, be more careful matching the ribbon since it will be very visible:

Larger flowers cover the ribbon so you don't need to get as picky (there are a few very large flowers that I used no ribbon at all)

Monday, June 8, 2009

Midnight Madness #4

Another Challenge card this one is for Midnight Madness #4.
Here is the Sketch that they provided:

And here is what I came up with:


I know it's pretty basic, but I love, love, love pink and brown together, so for me it doesn't get much better than this!

Doubling Up

Here is a card that I made to do double duty.
I Used the challenge from Truly Scrumptious which was to include more than one fold in your card.
And I followed this weeks sketch for Stamps and Smiles Sketch Challenge #18.
Here is the sketch that they provided:

And here is my creation:

A view from the front

And showing the double fold in the card.


Quilt Card

The Folks over at ABC challenge have weekly themes based on letters of the alphabet... this week is Q for Quilt, I like the cards they designed... but mine is a slightly different interpretation... I thought it would be fun to make a card that simply looked like a quilt pattern; so here we go:

Here's how I did it:

First I cut regular white paper with my Kraft Edgers scissors


(KE-26, the name of this pattern of scissors is 'bounces')

I then flipped my scissors over and cut very close to the first cut to get this chain effect.

Then I cut some medium blue and some dark blue paper into 3/4" squares. (Lots and lots of .75" squares). I could have cut strips and 'weaved' the paper together, but I liked the slightly messy look that I got from the individual squares. It looks very homemade.
Since I wanted the quilt on the front to by 5 squares by 7 squares, I made the card 3.75"x5.25"
I used plain white card stock for the card.

Here is the image of the untrimmed card with the background of the quilt pattern.


I started attaching the small chains of white ovals, I had the easiest time keeping the angles and such how I wanted, if I cut it into sections of two ovals per piece.


I continued laying down the oval chains, but did not continue the pattern into the outer rows of the 'quilt'.

I then cut white paper into strips about 1/4" wide and glued them around the center section of the 'quilt'.

I had intended to stop there, but it was not enough , so I punched out 1/8" punches from some yellow paper, and glue them into the center of each square that contained a pattern.


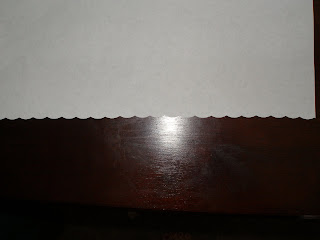
And of course, I trimmed down the edges of the card.

C.R.A.F.T. Challenge

So C.R.A.F.T. Challenge posted a challenge to create a brown-and-blue themed Fathers Day Card.
Here is what I cam up with:
I used a 4x6 Dark brown card stock for the card.
I cut a 2.5"x3.5" rectangle and a strip of paper that is 6"x about 1.5"
I then used the same dark brown card stock and cut a 2x3" rectangle and a 1x6" strip.
The last paper I used was a tan color, and I cut a rectangle that was about1.75"x2.75" and another at .75"x4".
I Stamped Dad on the rectangles with Blue ink, and then hand wrote Happy Fathers Day across the strips on the bottom. I added three blue brads, and two smaller brown brads between the to sections of the card.

Saturday, June 6, 2009

Sunday Sketch #4

Here is a card that I made for Sunday Sketch and Stamp

Here is the image that I used to create my card:


I have previously changed little things about the card when I've done sketch challenges, but I LOVED this layout- so I changed nothing!
First I got out two little cupcake stamps I had and stamp them on squares of white paper that were about 1-3/8".


After I stamped the images I colored them in with colored pencils.

I cut slightly larger squares from a pink card stock and layered those behind the cupcakes, I attached each of these pink squares to the front of my card, where I had stamped 'Happy Birthday' and attached a matching pink ribbon.

There is my finished product

CardPatterns Card

So it turns out that I absolutely LOVE doing the challenges where a website gives a sketch or a theme, and you create a card based on that. I originally thought it would be such a waste of time to sit around and design a card, and then only have one card to show for it. But it is nice to be able to use whatever stuff I want for the cards.... I don't need to make sure that I have enough ribbon for 20 cards to take to card swap. I still like card swap, but this is fun too!

Anyway, here is a card that I made for CardPatterns.
Here is the sketch I was supposed to follow:
Here's what I made:
I decided to keep the color scheme simple. I used a white card, placed black card stock on top of that, and then I used two different black and white patterns.
Then I used red for my color, I put a red ribbon across the card, stamped the 'swirly' and missing you, and traced over the swirly with a thin red marker. And then three red buttons in the corner to finish it off.

Tuesday, June 2, 2009

MIdnight Madness 3

Two days in a row!!! My son has gotten to an age where he can play on his own for long stretches of time, which means I have more time for crafting during the day... at least for the next 10 weeks until baby number 2 gets here.

So here we are; the card I made today for the Midnight Madness sketch challenge.

I cut a 4x6" card out of a burgundy card stock, and cut 4.5"x3.5" rectangles out of dark green and very pale green card stocks. I adhered the dark green piece to the light green piece just slightly offset, down and to the right.

Then I taped that down to the front of the card.

I used the same burgundy card stock and cut a 2.5" inch square and cut another 2.5"square from a mellow green color. I stamped 'Thank You' on the green square, stuck the two squares together at a slight angle, and taped that to the card.

With all of the paper pieces in place, I punched holes along the left hand side, where I placed my flowers, and fastened them with brads.

I then used a "paper ribbon" to go across the bottom.

Monday, June 1, 2009

My Mojo

So I often want to make a card for the blog Monday Mojo, but I have yet to get around to it.
This week I decided to do it and do it early, so here it is.

I used a 4x5.5" card.

The top is a patterned Vellum, and I found a paper to match to go across the bottom.

I cut a 2.25" square out of light yellow cardstock, and then found a slightly darker shade of yellow and cut a larger square to border the first square.

I stamped 'Thinking of You' and a daisy stamp that I had in Blue ink, and then also stamped the daisy in the bottom corners of the card.

I found a matching dark yellow ribbon and glued that across the seam between the two papers, then glued a yellow embellishiment ribbon across the bottom of the first ribbon, I used the same embellishment ribbon to thread through the bottun.